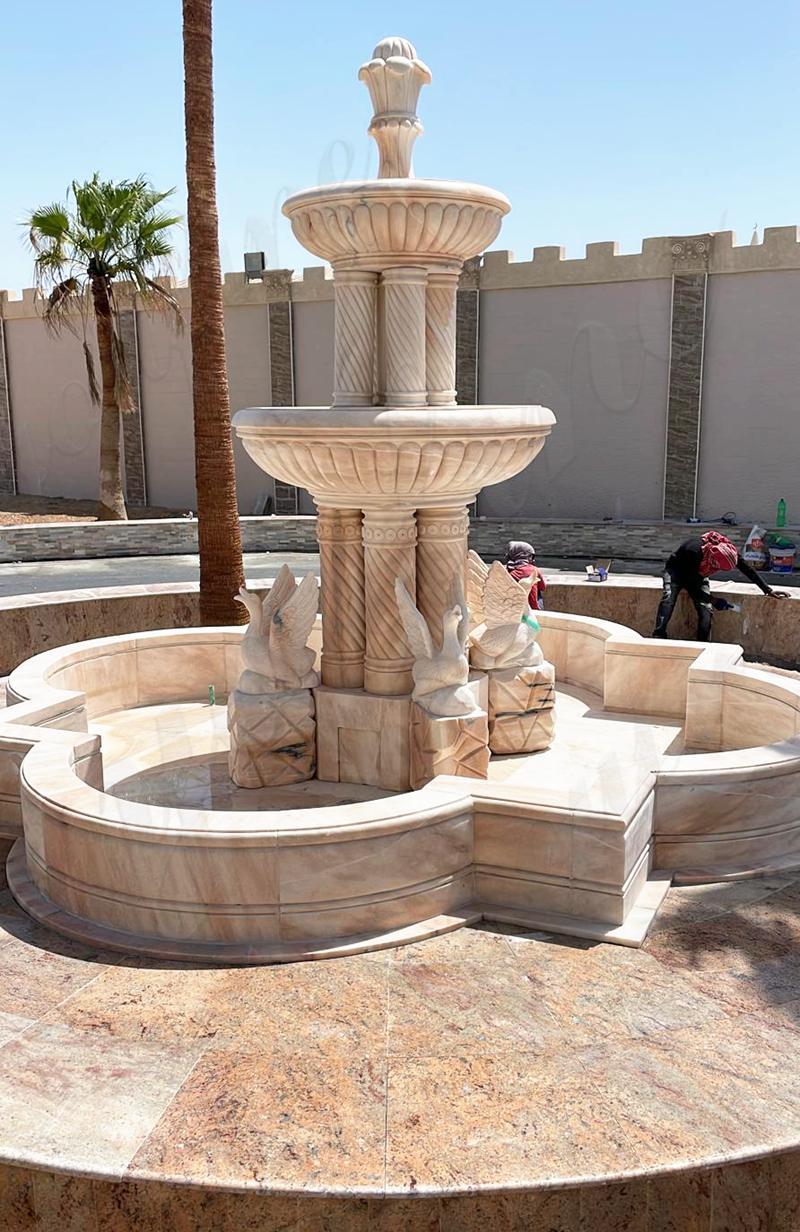
The Ultimate Guide to Install a Large Marble Fountain
Updated 09/1/2023 10:43 AM By Guo, Judy
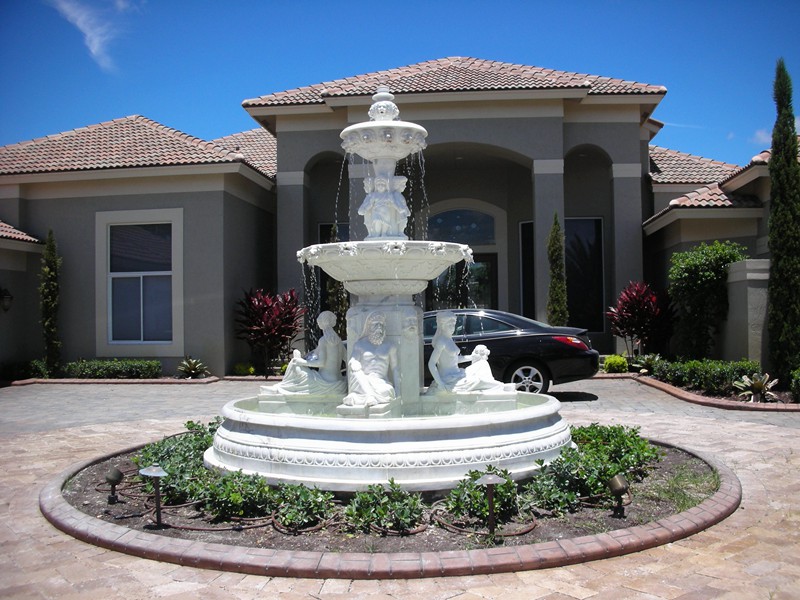
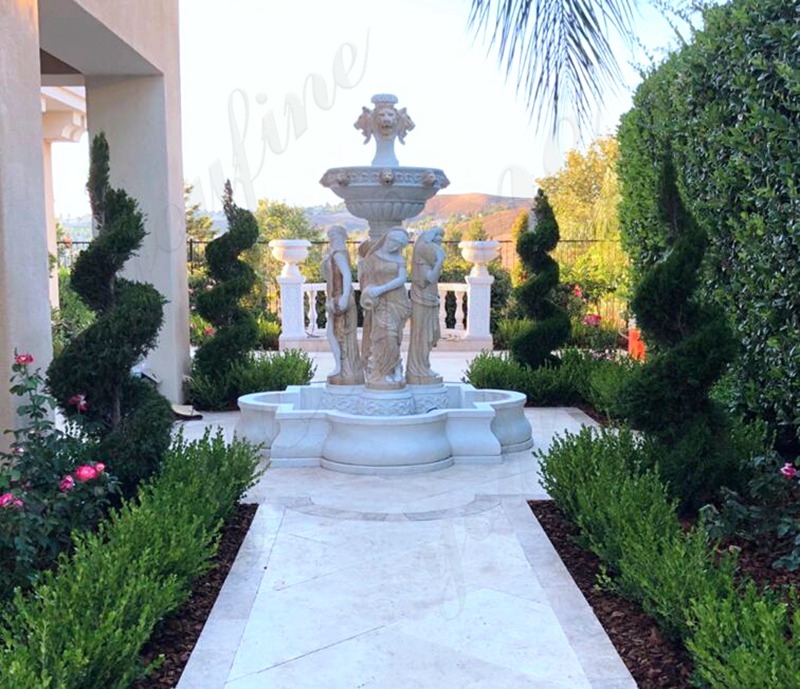
Having a large marble fountain in outdoor spaces brings a touch of timeless elegance and exquisite beauty that could transform any environment into a captivating oasis. These majestic focal points not only serve as stunning pieces of art but also create a sense of tranquility and serenity. The interplay of the marble’s natural veining and the soothing sound of cascading water fosters a harmonious ambiance, making it a centerpiece that enchants and mesmerizes. Whether gracing a luxurious garden, a grand courtyard, or a serene patio, a large marble fountain elevates the aesthetic appeal of the surroundings, inviting both relaxation and admiration.
Selecting the Perfect Location
Choosing the ideal location for your large marble fountain is a crucial step in ensuring its visual impact and functionality. Consider these key factors to make the most of your fountain installation:
Visibility and Focal Point: Place the fountain in a spot where it could be easily seen and appreciated. It should serve as a focal point, drawing attention and adding depth to the space.
Aesthetic Harmony: The fountain should complement the overall aesthetics of your outdoor area. Its design, style, and color should harmonize with the surrounding elements, such as landscaping, architecture, and other decor.
Proximity to Seating Areas: Position the fountain close to seating areas, like a patio or a seating nook. The soothing sound of flowing water enhances the ambiance and creates a relaxing environment for lounging and socializing.
Sunlight Exposure: Consider the sunlight patterns in the chosen location. Too much direct sunlight might cause water to evaporate quickly, requiring more maintenance. On the other hand, too little sunlight might promote algae growth.
Safety and Accessibility: Ensure that the fountain is easily accessible and doesn’t create any obstacles in the pathway. Also, consider safety measures if you have young children or pets.
Structural Support: Larger marble fountains could be heavy, so the chosen location should have a stable foundation to support the weight. Consult with professionals if needed.
Water Source and Drainage: The location should have access to a water source for filling the fountain and a proper drainage system to prevent water accumulation.
Visual Impact: Experiment with different placements to assess the visual impact from various angles. The fountain should enhance the view from both near and far.
Climate Considerations: In colder climates, ensure that the fountain could be properly winterized to avoid freezing and potential damage.
Personal Enjoyment: Ultimately, choose a location where you could enjoy the fountain’s presence the most. It could be a spot visible from your home’s interior or a serene corner where you like to unwind.
By carefully considering these factors, you’ll be able to find the perfect location for your large marble fountain, maximizing its allure and creating an enchanting outdoor oasis.
Preparing the Properly Site
Properly preparing the site is essential to ensure a successful and lasting installation of your large marble fountain. Follow these steps to get your outdoor space ready for the fountain:
Clear the Area: Remove any obstacles, debris, or vegetation from the chosen location. Ensure a clean and level surface for the fountain’s base.
Measure and Mark: Use measuring tools to mark the exact dimensions of the fountain’s base on the ground. This would serve as a guide for excavation and positioning.
Excavation: Dig a hole that matches the marked dimensions of the fountain’s base. The depth of the hole would depend on the specific requirements of the fountain model and its base.
Foundation Preparation: Create a sturdy foundation for the fountain by adding a layer of compacted gravel or crushed stone to the excavated hole. This would provide stability and proper drainage.
Leveling: Ensure that the foundation is level and even. Use a level tool to confirm that all sides of the foundation have the same height.
Electrical and Water Connections: If your fountain requires electrical or water connections, plan and install them at this stage. Ensure proper conduit and piping are in place for future connections.
Secure the Fountain Base: Carefully place the fountain’s base on the prepared foundation. Double-check its alignment and levelness.
Backfilling: Fill the gaps around the base with more gravel or crushed stone, securely compacting the material as you go. This step provides additional stability to the fountain.
Final Leveling: Make any necessary adjustments to ensure the fountain is perfectly level and stable. This is crucial for the fountain’s functionality and aesthetic appeal.
Testing: Before proceeding further, test the water flow and fountain components to make sure everything is working as intended.
Surrounding Landscaping: Consider adding landscaping elements around the fountain, such as decorative stones, plants, or a pathway. This enhances the overall visual appeal of the installation.
Finishing Touches: Clean the fountain’s surface and surrounding area. Ensure that all components are secure and in place.
By following these steps, you’ll create a solid and well-prepared foundation for your large marble fountain. Proper site preparation contributes to the fountain’s stability, longevity, and overall visual impact in your outdoor space.
The Tools and Materials
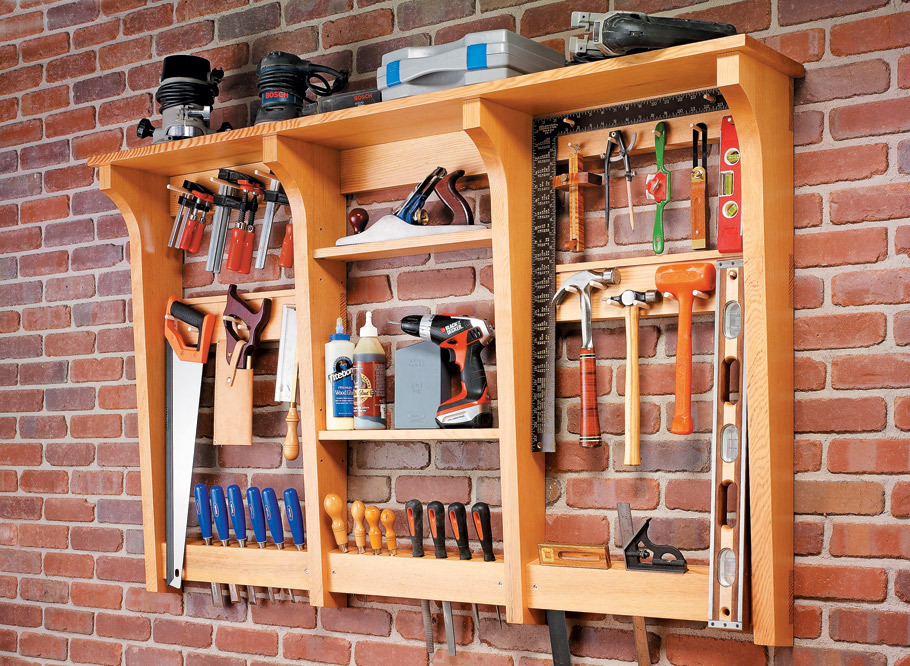
To ensure a smooth and successful installation process for a large marble fountain, you’ll need a range of tools and materials. Here’s a comprehensive list of what you’ll require:
Tools
Shovels and Spades: For excavation and preparation of the site.
Leveling Tools: Including a builder’s level, laser level, or leveling app for precise measurements.
Measuring Tape: Essential for marking the dimensions of the fountain’s base.
Wheelbarrow: For transporting materials like gravel, concrete, and tools.
Trowels: Used for applying mortar or concrete mix.
Rubber Mallet: To gently tap and secure fountain components in place.
Screwdrivers and Wrenches: For assembling and securing fountain parts.
Masonry Tools: Including chisels and masonry hammer for adjusting stone or concrete components.
Safety Gear: Such as gloves, safety glasses, and work boots to protect yourself during installation.
Materials
Concrete Mix: For creating the fountain’s stable base and anchoring components.
Gravel or Crushed Stone: To create a compacted foundation layer for drainage and stability.
Mortar Mix: Used for joining and securing the fountain’s components.
Fountain Components: Including the fountain basin, pedestal, tiers, spouts, and decorative elements.
Plumbing Components: Such as pipes, hoses, and a water pump for circulating water.
Waterproof Sealant: To prevent water leakage and ensure longevity.
Anchoring Hardware: Bolts, screws, and anchors for securing the fountain components.
Water Source: Depending on the design, you may need access to a water supply line.
Electrical Wiring: For fountain lighting or water pump operation.
Landscape Fabric: To prevent weed growth beneath the fountain.
Sand or Gravel: For leveling and stabilizing the fountain’s base.
Having these tools and materials on hand ensures that you’re well-equipped to handle each step of the installation process. Remember that safety gear is essential to protect yourself during the installation, and having the right tools would contribute to the precision and quality of the final result.
Installing the Foundation for Large Marble Fountain
Creating a solid foundation is crucial for the stability and longevity of your large marble fountain. Follow these steps to ensure a secure base:
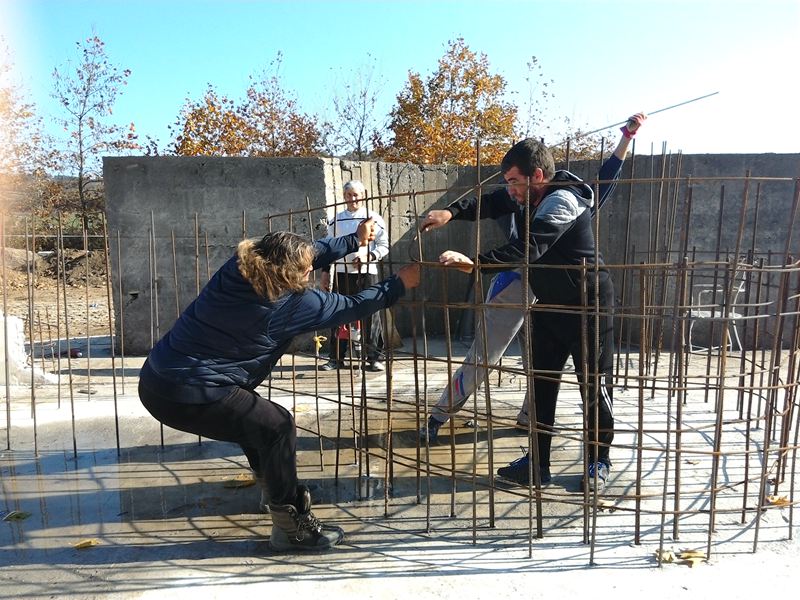
Site Preparation: Begin by marking the outline of the fountain’s base using stakes and string. Clear the area of any debris, vegetation, or obstacles. Make sure the site is level and properly graded to allow for proper drainage.
Excavation: Dig a hole according to the dimensions of the fountain’s base. The hole should be deep enough to accommodate the concrete base and any additional layers of gravel or sand. Ensure the hole is level and well-compacted.
Adding Gravel: Fill the excavated hole with a layer of gravel or crushed stone. This layer provides a stable and compacted base for the concrete to rest on. Use a tamper to compact the gravel evenly.
Pouring Concrete: Prepare the concrete mix according to the manufacturer’s instructions. Pour the concrete into the hole, making sure it covers the entire area and reaches the desired height. Use a trowel to level the surface and ensure an even layer.
Leveling and Alignment: As you pour the concrete, use a builder’s level or laser level to ensure that the base is perfectly level and aligned. This step is crucial for the proper installation of the fountain components.
Anchoring Components: While the concrete is still wet, carefully place the fountain’s pedestal or basin onto the concrete base. Press the components gently to create an indentation in the concrete. This would help anchor the components securely.
Allowing Setting Time: Let the concrete set and cure according to the manufacturer’s recommendations. This usually takes a few days. During this time, keep the area protected from foot traffic or any heavy loads.
Waterproofing: Apply a waterproof sealant to the surface of the concrete. This helps prevent water infiltration and ensures the longevity of the foundation.
Finishing Touches: Once the concrete is completely set and cured, inspect the foundation for any uneven spots or imperfections. Make any necessary adjustments before proceeding with the installation of the fountain components.
Creating a solid foundation is the essential first step in installing a large marble fountain. By following these steps and allowing the concrete to be properly set, you’ll ensure that your fountain stands securely and beautifully in your outdoor space.
Build up the Fountain Components
Now that the foundation is in place, it’s time to bring your large marble fountain to life by assembling its various components. Follow these steps to ensure a seamless assembly:
Prepare the Components: Lay out all the components of your fountain near the installation site. This includes the basin, pedestal, tiers, spouts, and any other decorative elements that come with your fountain.
Attach the Basin: Begin by carefully placing the basin onto the concrete foundation. Gently press down to ensure a secure fit. Align the basin properly with the markings you made during the leveling process.
Position the Pedestal: If your fountain includes a pedestal, carefully position it over the basin’s central opening. Ensure that the pedestal is centered and level. Some pedestals may require anchoring bolts to secure them to the foundation.
Add Tiers and Spouts: If your fountain has multiple tiers, start by attaching the upper tiers to the lower ones. Follow the manufacturer’s instructions for securely connecting each tier. Attach any spouts or water distribution elements according to the design.
Secure Decorative Elements: Depending on your fountain’s design, you may have additional decorative elements such as statues, figurines, or ornamental details. Attach these elements securely to their designated spots.
Connect Water Pump and Lines: If your fountain includes a water pump, follow the manufacturer’s guidelines for installation. Attach the water pump to the appropriate connection point and route the water lines to ensure proper water circulation.
Test the Water Flow: Before finalizing the assembly, turn on the water pump to test the water flow and ensure that water is properly circulating through the fountain. Adjust the pump settings if needed to achieve the desired water flow and sound.
Check for Alignment: Take a step back and inspect the entire assembly for proper alignment, symmetry, and stability. Make any necessary adjustments to ensure that all components are well-balanced and visually pleasing.
Secure Bolts and Nuts: Once you’re satisfied with the assembly, tighten any nuts, bolts, or fasteners that may be required to secure the various components. This would help prevent any shifting or wobbling over time.
Finishing Touches: After confirming that all components are securely attached and aligned, perform a final visual inspection. Wipe down the marble surfaces to remove any dirt or smudges, ensuring the fountain looks its best.
By carefully assembling each component and paying attention to alignment and stability, you’ll transform your outdoor space into a captivating oasis with the mesmerizing beauty of a large marble fountain. Your efforts would be rewarded with a stunning focal point that adds elegance and tranquility to your surroundings.
Connecting Water and Electrical Systems
Whether it’s a stunning fountain, a soothing waterfall, or captivating lighting, the combination of water and electricity creates a mesmerizing symphony of beauty and functionality.
Step 1: Safety Precautions
Safety should always be a top priority when dealing with water and electricity. Ensure that all electrical connections and components are installed according to local codes and regulations. Consider installing Ground Fault Circuit Interrupters (GFCIs) to protect against electrical shocks. Additionally, keep electrical connections and outlets away from water sources to prevent any potential hazards.
Step 2: Planning the Layout
Careful planning is essential to determine the optimal placement of water features and electrical components. Sketch out a layout that clearly indicates the location of the water source, pump, filter, lighting fixtures, and electrical outlets. Ensure that the layout facilitates easy access for maintenance and repairs if needed.
Step 3: Running Electrical Wires
Begin by running electrical wires from the power source to the designated outlets. Use conduit pipes to protect the wires and prevent exposure to water. Waterproof junction boxes should be installed at each connection point to keep the electrical connections safe and dry.
Step 4: Waterproofing Connections
To ensure the longevity and safety of the installation, it’s crucial to properly waterproof all connections. Use waterproof wire connectors and sealants to protect the wires from moisture. Seal the openings of conduit pipes and junction boxes to prevent water from entering.
Step 5: Installing Lighting
If your outdoor space includes lighting features, follow the manufacturer’s instructions for installation. Ensure that lighting fixtures are securely mounted and positioned to provide optimal illumination without direct exposure to water.
Step 6: Testing and Inspection
After completing the installation, thoroughly test all water and electrical components. Check for proper functionality and ensure that there are no electrical issues, leaks, or malfunctions. It’s advisable to have a professional inspect the installation to ensure compliance with safety standards.
In conclusion, the art of connecting water supply and electrical components requires meticulous planning, careful execution, and adherence to safety guidelines. By following these steps, you could achieve a harmonious integration of water and electricity, transforming your outdoor large marble fountain into a captivating haven of elegance and functionality.
Testing and Adjusting Water-Flowing
The installation of water supply and electrical components is installing a large marble fountain step towards enhancing the charm and allure of your outdoor space. However, the process doesn’t end with the installation itself. To ensure that your water features operate flawlessly and harmoniously, thorough testing and adjustments are essential. next, we’ll guide you through the crucial steps of water-flowing testing.
Step 1: Water Flow Evaluation
After the installation is complete, the first step is to assess the water flow within your water feature. Turn on the pump and observe the water flow rate. Check for any blockages, restrictions, or irregularities that might affect the flow. Adequate water flow is essential for the proper functioning and visual appeal of your water feature.
Step 2: Pump Efficiency Check
The efficiency of the pump is pivotal for maintaining the desired water flow and circulation. Monitor the pump’s performance and listen for any unusual noises. Ensure that the pump is working smoothly and consistently. If you notice any issues, such as reduced water flow or unusual sounds, consult the manufacturer’s instructions or seek professional assistance.
Step 3: Adjusting Water Stream and Spray
If your water feature includes adjustable nozzles, sprayers, or jets, take the time to adjust them according to your preferences. Experiment with different settings to achieve the desired water stream and spray patterns. This adjustment not only enhances the visual aesthetics but also ensures that water doesn’t stray beyond the desired area.
Step 4: Lighting Alignment
If your installation involves lighting components, verify that the lighting fixtures are aligned correctly and provide the intended illumination. Make any necessary adjustments to achieve the desired lighting effect. Properly positioned lighting could significantly enhance the overall ambiance of your outdoor space, especially during evening hours.
Step 5: Addressing Water and Electrical System Issues
During the testing phase, closely monitor the entire water and electrical system for any signs of leakage, electrical malfunction, or inefficiency. If you encounter any issues, address them promptly to prevent further complications. It’s recommended to consult with professionals if you’re unsure about how to resolve any problems.
Step 6: Regular Maintenance Plan
Once your water supply and electrical components are tested and adjusted to your satisfaction, establish a regular maintenance plan. Regularly inspect the system, clean filters, check for blockages, and ensure that all connections are secure. Following a maintenance routine would help prolong the lifespan of your installation and ensure its continuous functionality.
In conclusion, testing and adjusting your integrated water supply and electrical components are vital steps to ensure their seamless operation and longevity. By carefully evaluating water flow and pump efficiency, adjusting water streams, and addressing any issues that arise, you could create a captivating outdoor oasis that not only mesmerizes the senses but also stands the test of time.
Check Out: More Marble Fountains
Backfilling and Finishing Touches
As you near the completion of your large marble fountain installation journey, it’s time to focus on the final steps that would transform your outdoor space into a captivating oasis. Backfilling around the fountain’s base and adding those subtle finishing touches would not only ensure stability but also elevate the overall aesthetics of your masterpiece. In this section, we’ll guide you through the process of backfilling and offer suggestions on enhancing the fountain’s appearance.
Step 1: Backfilling the Base
After the foundation is set and the fountain components are securely in place, it’s time to backfill the area around the base. Use soil that is compatible with your landscape and climate. Gently pack the soil around the base, ensuring that it is level and stable. This process not only provides support to the structure but also conceals any gaps or openings.
Step 2: Adding Decorative Elements
To enhance the visual appeal of your fountain, consider incorporating decorative elements such as gravel, river rocks, or plants around the base. These elements not only add texture and contrast but also help seamlessly blend the fountain with its surroundings. Choose colors and materials that complement your outdoor theme and create a harmonious ambiance.
Step 3: Planting Around the Fountain
Adding plants around your water fountain could further enhance its beauty and create a harmonious natural setting. Opt for plants that thrive in your climate and require minimal maintenance. Consider using ornamental grasses, flowering shrubs, or even trailing vines to create a lush and inviting environment. Planting strategically could also provide shade and privacy, transforming your outdoor space into a serene retreat.
Step 4: Mulching for Protection
After planting, apply a layer of mulch around the base of the fountain. Mulch not only helps retain moisture and suppress weed growth but also provides insulation for the soil, helping to maintain stable temperatures for your plants. Choose a mulch that complements your landscape and adds to the overall visual appeal.
Step 5: Sealing and Protecting
you could consider applying a sealant to protect large marble fountains from weathering and staining. A suitable sealant would preserve the fountain’s appearance and ensure its longevity, allowing you to enjoy its beauty for years to come.
Step 6: Regular Maintenance Plan
With your fountain surrounded by carefully chosen decorative elements and lush greenery, establish a regular maintenance plan. Regularly water and care for the plants, replenish mulch as needed, and inspect the fountain’s condition. A well-maintained environment would keep your fountain looking pristine and inviting.
In conclusion, backfilling around the marble fountain’s base and adding thoughtful decorative elements contribute to the overall charm and aesthetics of your outdoor space. By integrating these finishing touches, you’ll create a captivating focal point that not only complements your landscape but also provides a tranquil haven where beauty and serenity converge.
Regular Maintenance and Preserving Elegance
Congratulations on the installation of your exquisite marble fountain! As you embark on a journey of beauty and tranquility, it’s crucial to establish a regular maintenance routine to ensure your fountain remains a captivating focal point for years to come. Then, we would guide you through essential maintenance tips to preserve the timeless elegance of your large marble fountain masterpiece.
Cleaning and Care
Regular cleaning is key to maintaining the pristine appearance of your marble fountain. Here’s how you could keep it looking its best:
Gentle Cleaning: Use a soft cloth or sponge to wipe down the marble surface regularly. Avoid abrasive materials that could scratch the marble’s finish.
Mild Soap Solution: For more thorough cleaning, prepare a mixture of mild soap and water. Gently scrub the marble surface and rinse with clean water. Avoid using harsh chemicals that could damage the marble.
Avoid Stagnant Water: To prevent the growth of algae and other contaminants, regularly replace the water in the fountain. Stagnant water could also lead to mineral deposits on the marble surface.
Winterization
As the colder months approach, it’s important to prepare your marble fountain for winter to prevent damage:
Drain the Fountain: Before freezing temperatures set in, drain the fountain to prevent water from freezing and causing cracks.
Cover or Store: Consider covering your fountain with a waterproof cover to protect it from snow and ice. Alternatively, you could dismantle and store the fountain indoors if space allows.
Addressing Issues
Promptly addressing any issues that arise could prevent them from escalating and ensure your fountain’s longevity:
Stains and Discoloration: If your marble fountain develops stains or discoloration, consult with professionals to determine the best method of restoration.
Cracks or Chips: If you notice cracks or chips in the marble, it’s essential to address them promptly to prevent further damage. Contact experts in marble repair for professional assistance.
Pump and Component Check: Regularly inspect the fountain’s pump and electrical components to ensure they are functioning properly. Address any issues promptly to maintain the fountain’s water flow and lighting.
By following these maintenance tips, you’ll be able to enjoy the beauty and elegance of your large marble fountain throughout the seasons. Regular care and attention would not only preserve the timeless charm of your masterpiece but also create an inviting oasis that continues to captivate all who behold it.
Transforming Your Space with a Large Marble Fountain
Enjoy the Marble Fountain Beauty and Serenity
Now that your large marble fountain graces your outdoor space, take a moment to relish the beauty and serenity it brings. The gentle sound of flowing water and the elegant aesthetics create an atmosphere of tranquility and charm.
At YouFine Art, we are dedicated to ensuring your fountain remains a source of joy and inspiration. We provide comprehensive installation guidance, including instructional videos. If it’s genuinely necessary and feasible in actual circumstances, we are prepared to provide on-site installation support to guarantee that your large marble fountain is positioned flawlessly.
Explore YouFine Art Marble Fountain
Ready to embark on more artistic journeys? We invite you to explore YouFine Art’s range of large marble fountains, each a masterpiece waiting to transform your space. Discover fountains that resonate with your vision and let your outdoor area become a sanctuary of elegance and grace.
Let the timeless allure of large marble fountains enrich your surroundings and create lasting memories. Your journey to an enchanting outdoor oasis begins with us at YouFine Art.
More Questions about Installing a Large Marble Fountain
Q: How do I choose the right location for my marble fountain?
A: Look for a level, well-drained area away from trees or structures that could damage the fountain.
Q: Do I need to prepare the site before installation?
A: Yes, clearing the area, leveling the ground, and ensuring proper drainage are important steps.
Q: What tools and materials do I need for installation?
A: Tools like shovels, concrete, leveling tools, and safety gear are essential, along with the fountain components.
Q: How do I create a solid foundation for the fountain?
A: Dig a hole, add a concrete base, and let it set to provide stability for the fountain.
Q: What’s the process for assembling the different fountain components?
A: Attach the basin, pedestal, tiers, and other decorative elements according to the manufacturer’s instructions.
Q: How do I ensure proper water flow and pump efficiency?
A: Test the water flow, check pump efficiency, and adjust settings as needed for optimal performance.
Q: What’s the best way to backfill around the fountain’s base?
A: Backfill with soil, and consider using decorative elements like gravel or plants to enhance its appearance.
Q: How could I maintain the beauty of my marble fountain over time?
A: Regular cleaning, winterization, and addressing any issues promptly would help preserve its beauty.
Q: Could I get on-site installation assistance if needed?
A: Yes, if necessary and feasible, we could provide on-site guidance to ensure a perfect installation.
Q: Where could I explore a range of large marble fountains for my project?
A: You could explore our collection at YouFine Art to find the perfect marble fountain for your space.
For more installation instructions for marble fountains, please check:
5 Useful Things Need to Consider before Installing an Outdoor Water Fountain
Last Article:
Italian Style Large Beige Marble Garden Gazebo Suppliers MOKK-747
Next Article: